

Before & After Image Lab
Two reference-image editing experiments: product relighting and scratch cleanup, with interactive comparisons, exact prompts and critical result reviews.
A useful edit can be explained and inspected. Observe the light or cleanup, then compare object boundaries, detail and texture. These two experiments use generated reference images; the other library-card images illustrate concepts.
From a catalog image to advertising light
The goal is to change the light and backdrop while retaining the bottle silhouette, position and ivory material. The original is an AI illustration used as the reference for the edit shown here.
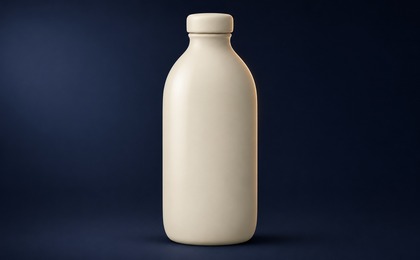
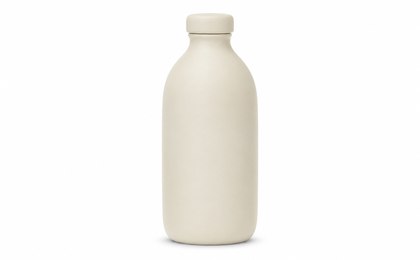
Drag the slider or use the arrow keys. Home and End reveal either image in full.
What should you inspect?
- Watch the cap and body edges as the divider moves.
- Compare the material color away from bright reflections.
- Inspect the base contact shadow and light direction.
The edit changes the lighting mood while retaining the overall silhouette. Generative edits may shift edge curvature or color slightly; real product geometry and branding still need comparison with an approved reference before commercial use.
The exact editing prompt used
Edit this EXACT provided ceramic bottle photograph for a before-and-after lighting lesson. Retain identical bottle silhouette, exact frame position and pixel proportions, cap geometry, warm ivory material, no label, and same front camera angle. Do not move or resize the bottle. Change ONLY the studio lighting and backdrop: premium dark midnight navy seamless background and surface, beautiful broad softbox reflection on the left with subtle warm rim separation at right and a believable contact shadow. Bottle remains light ivory not metallic. All edges and full cap/base stay in identical image locations. Maintain original wide aspect ratio 420:260. No text, no props, no crop.
An actual reference-image edit using the built-in image-generation tool, based on a generated source. The result is exported as JPG at the original 420 × 260 size for comparison. Other tools or runs may produce different results.
Scratch cleanup with a detail check
The goal is to reduce dust and scratches while retaining the framing, sepia tones and paper texture. The original is a fictional AI-generated vintage scene, not an archival document.
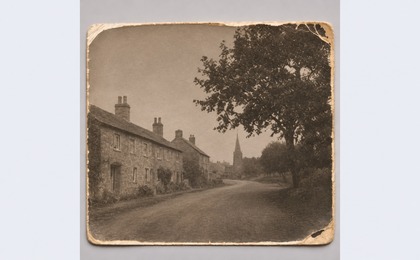
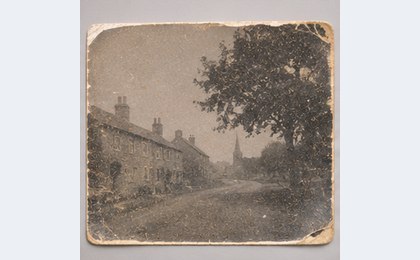
Drag the slider or use the arrow keys. Home and End reveal either image in full.
What should you inspect?
- Start with visible dust across the sky and road.
- Compare windows, branches and the distant spire in both images.
- Inspect the paper edges and grain before accepting the result.
The output has fewer scratches and clearer tones, but some fine building and tree details differ or appear more defined. Generation can infer details: these are not verified recoveries of original information. For documents, retain the original scan and inspect each edited area.
The exact editing prompt used
Edit the supplied image for an honest before-and-after conservative photo-cleanup demonstration. Keep the EXACT same framing, proportions, photo paper placement, light grey outer background, border shape, street perspective, buildings, chimneys, distant church spire and tree branches in precisely their original positions. Remove scattered white dust spots and small scratches on the photographic surface, gently improve tonal clarity without inventing scene details. Retain monochrome warm sepia, fine grain and natural period softness. Retain the worn paper edges, do not reconstruct missing architecture or add people. Do not crop, zoom, enlarge or move the photo within the canvas. Original wide 420:260 aspect ratio. No text. This input is an AI fictional vintage scene, not a real archival document.
An actual reference-image edit using the built-in image-generation tool, based on a generated source. The result is exported as JPG at the original 420 × 260 size for comparison. Other tools or runs may produce different results.
How can you apply the method?
- Keep the original separate and define one requested change.
- Specify what must remain fixed: identity, geometry, position or artwork.
- Run the edit in your chosen tool using a reference image. This lab displays saved results and does not send your files to a generation service.
- Inspect the result at a useful magnification. If an important element changes, return to the original and narrow the request.
- Export JPG for display and retain the original and editable version for review.
The library’s / labels are organizational names, not official commands shared by generation tools. Use the written description and supply the reference image.
Read the prompt-writing guide ↗Eng. Emanoeel Nabil - AI Specialist - www.emanoeel.info